Building a 44.4V battery pack for an e-bike, e-scooter, or solar setup means one component decides whether your pack lasts for years or burns out in weeks: the BMS. This guide covers both sides of that decision — what to actually look for when buying a 12S BMS, and exactly how to wire it once you have one in hand.
Looking at the BMS 12S 44.4V/40A already? Here's everything you need to know before and during installation.
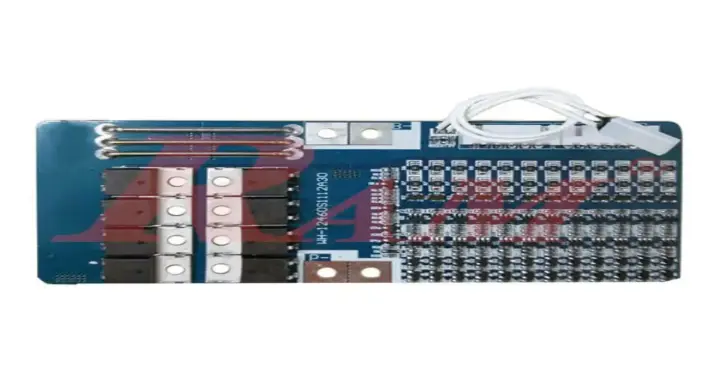
What to Look for When Buying a 12S BMS
Peak Current (40A) — Why It's Not Just a Number
A BMS rated "40A peak" means it can handle short bursts up to that current — like the initial surge when a motor starts — without the MOSFETs overheating or cutting out. If your motor's continuous draw is close to or above the BMS's peak rating, the BMS will trip or fail under load. Match the BMS's peak rating to your actual motor's peak draw, not just its average current.
Balance Leads — What They Actually Do
Balance leads (B1 through B12 on a 12S BMS) let the BMS monitor and correct each individual cell's voltage, not just the pack's total voltage. Without accurate balancing, one weak cell in the series string can be pushed to overcharge or overdischarge even while the pack's total voltage looks normal — which is how packs degrade fast or fail unexpectedly.
Voltage Range — Li-ion vs. LiFePO4
This is the detail people miss most often: a BMS's voltage range must match your cell chemistry.
- Li-ion cells: roughly 3.0V–4.2V per cell
- LiFePO4 cells: roughly 2.6V–3.65V per cell
Using a Li-ion-range BMS on a LiFePO4 pack (or vice versa) means the BMS will cut off at the wrong voltage — either leaving capacity unused or, worse, failing to protect the cells at their actual limits. The BMS 12S 44.4V/40A supports both ranges, so confirm which one matches your cells before wiring anything.
Other Specs Worth Checking
- Board size (34 × 53.5 × 3.0mm on this model) — confirm it fits your enclosure
- Temperature switch — adds thermal protection beyond voltage/current alone
- Shared vs. separate charge/discharge port — this model uses the same port for both, which simplifies wiring
How to Wire Your 12S BMS — Step by Step
Before You Start: Match Your Cells
Cells that are mismatched before assembly are the single most common cause of BMS and pack failures. Before wiring anything:
- Internal resistance should be within 5 milliohms across all 12 strings
- Voltage should be within 0.03V across all cells
- Capacity should be within 50mAh across all cells
- If cells are fully charged, discharge them to a standard range first (Li-ion: 3–4V, LiFePO4: 2.6–3.5V)
Step 1: Connect the Main Negative (B-)
Connect the BMS's B- wire to the battery pack's total negative terminal.
Step 2: Connect the Balance Leads in Order
This is the step where mistakes are most damaging. Connect balance leads strictly in ascending order — B1, then B2, then B3, and so on up to B12:
- B1 connects to the junction between cell 1's positive and cell 2's negative
- B2 connects to the junction between cell 2's positive and cell 3's negative
- Continue sequentially through the pack
- B12 connects to the total positive terminal of the pack
Never skip a connection or connect them out of order — this causes inaccurate voltage readings at best, and a damaged BMS at worst.
Step 3: Verify Before You Plug In
Before connecting the balance wire connector to the BMS itself, use a multimeter to check the voltage between each neighboring pair of balance points. Each reading should roughly match a single cell's voltage (for Li-ion, under 4V; for LiFePO4, under 3.5V). If any reading is off, stop and recheck your connections — plugging in a miswired balance connector can burn out the BMS instantly.
Step 4: Connect the Balance Connector, Then P- and Pack Positive
Once every voltage checks out, plug the balance connector into the BMS (low pin to high pin). Connect the charge/discharge wire to the "P-" terminal, and connect the pack's total positive directly to the battery's general positive terminal — the BMS only switches the negative side of the circuit.
Step 5: Final Voltage Check
Test the voltage between the battery's general negative and general positive one more time, and confirm it matches your pack's expected total voltage (44.4V for a fully charged 12S Li-ion pack, or the equivalent for LiFePO4) before putting the pack into service.
Frequently Asked Questions
What does "12S" mean on a BMS?
"S" stands for series — 12S means the BMS is built for 12 cells connected in series, which is what gives a pack its 44.4V nominal (Li-ion) rating.
Can I use this BMS with LiFePO4 cells instead of Li-ion?
Yes, as long as your charger and voltage thresholds match LiFePO4's range (roughly 2.6V–3.65V per cell) rather than Li-ion's range.
What happens if I connect the balance wires out of order?
It can produce inaccurate voltage readings or damage the BMS. Always connect B- first, then B1 through B12 in strict ascending order.
Do I need to solder the balance wires directly to the cells?
Yes — balance leads need a solid connection at each cell junction. Loose or cold-soldered joints are one of the most common causes of inaccurate balancing.
What's the difference between the charge and discharge port on this BMS?
This model uses the same port for both charging and discharging, which simplifies wiring compared to BMS models with separate charge and discharge ports.
Building a 12S pack and need the right BMS? Shop the BMS 12S 44.4V/40A