The ESP32 2.8 inch touchscreen is one of the most rewarding boards to start with when you want a project that works on its own — no computer attached, no separate screen, just a self-contained device with a display you can tap.
Because the ESP32 and the 2.8" TFT display sit on a single board, you can build an ESP32 touchscreen project — a control panel, a menu, a simple dashboard — and have it run the moment you power it up.
This step-by-step guide takes you from an unboxed board to a working touch interface, and shows how to fix the problems most beginners hit along the way.
Here is the whole project in short: set up the Arduino IDE for the ESP32, install the display and touch libraries, load the configuration that matches this board, and upload a sketch.
The result is a screen that shows graphics and responds to touch — all running from the board alone. Let's go through it step by step.
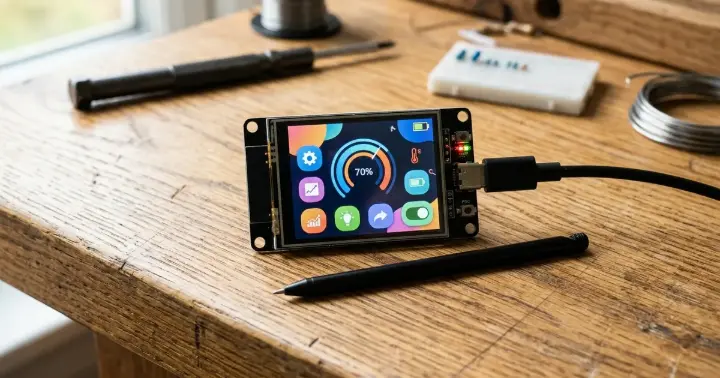
What You Need to Get Started
One of the best things about this project is how little you need:
- The board itself — an ESP32 2.8-inch TFT touchscreen display, which is an ESP32-WROOM-32E module with a 2.8" display and touch already built in.
- A USB cable that matches the board's port, to connect it to your computer for uploading code and for power while you test.
- A computer running the Arduino IDE.
That is the whole list. Because the display and touch are already connected to the ESP32 on the board, there is no breadboard, no jumper wires, and no soldering to get started.
Getting to Know the Board
Spending a minute on what is actually on the board makes the rest of the project much clearer:
- The brain: an ESP32-WROOM-32E module — a dual-core processor running at up to 240 MHz, with Wi-Fi and Bluetooth built in.
- The screen: a 2.8" TFT display with a resolution of 240×320 pixels, driven by the ILI9341 controller over the SPI bus.
- The touch: a resistive touch layer read by the XPT2046 controller. These boards usually ship with a small stylus pen.
- The connections: a USB port for uploading code and power, and — on most versions — a few broken-out GPIO pins so you can add sensors or outputs later.
Because everything is on one board, "standalone" simply means the finished program lives in the ESP32's flash memory and runs every time the board has power — with or without a computer connected.
Setting Up the Software
This is where most of the work happens, and where most mistakes are made, so take it slowly.
- Install the Arduino IDE and add ESP32 support: open Boards Manager, search for the ESP32 package by Espressif, and install it. Then select the matching ESP32 board under the Tools menu.
- Install the display library: TFT_eSPI by Bodmer handles the ILI9341 display.
- Install the touch library: XPT2046_Touchscreen by Paul Stoffregen reads the resistive touch. For richer, app-like interfaces, many makers also add the LVGL graphics library.
- Load the correct configuration. TFT_eSPI has to be told which display driver and which pins this board uses. Use the configuration or the sample programs supplied for this board rather than a random setup copied from the internet — a wrong pin configuration is the single most common reason a screen stays blank.
Building Your First Standalone Touch Interface
With the software ready, build up the project in small, testable steps:
- Confirm the display. Upload a basic example — a simple graphics sketch or one of the board's sample programs. If you see shapes or text, your display configuration is correct and the hardest part is behind you.
- Add touch. Read the X and Y position each time the screen is pressed and print it to the Serial Monitor. Seeing the numbers change as you tap confirms touch is working.
- Draw a simple UI. Put one or two buttons on the screen, check whether a touch falls inside a button's area, and make it do something — switch to another screen, toggle an output pin, or update a value on the display.
- Make it standalone. Once it behaves the way you want, the program is already saved in the ESP32's flash. Unplug the board from the computer, power it from any USB source, and it runs on its own.
Calibrating the Touch
Resistive touch reports raw numbers that have to be mapped to screen coordinates, so your first taps may land slightly off target.
A quick calibration fixes this: touch each corner of the screen, note the raw values the board reports, and map those values to the 240×320 pixel range.
Good calibration is the difference between a screen that feels accurate and one that is frustrating to use.
What You Can Build Next
Once you can draw a button and read a touch, the same board becomes the front panel for all kinds of standalone projects:
- A home control panel — on-screen buttons that switch lights or appliances, with the ESP32's Wi-Fi sending the commands.
- A thermostat or sensor dashboard — read a temperature or humidity sensor through the board's GPIO pins and show the values live on the screen.
- A device menu — a simple multi-screen menu to set options for another project, with no serial monitor needed.
- A small game or learning toy — draw simple shapes and respond to touch for an interactive, offline mini-game.
- An offline status display — a clock, timer, or counter that runs entirely on the board.
Each one reuses the same skills from this guide — draw to the screen, read the touch, act on it — so every new project is faster than the last.
Common ESP32 Touchscreen Problems (and How to Fix Them)
Almost every issue beginners meet with this board falls into one of these:
- Blank or white screen: nearly always the wrong display configuration. Confirm TFT_eSPI is set for the ILI9341 driver and this board's pins.
- Display works but touch does not: the touch settings or the XPT2046 pins are not configured correctly — check the touch library setup.
- Touch is inaccurate or offset: you skipped calibration, or the mapping ranges are wrong for your unit. Re-run the calibration step.
- Upload fails or the board is not detected: the correct ESP32 board is not selected in the IDE, or you are using a charge-only USB cable. Use a proper data cable and select the right COM port.
- Colors look inverted or the image is mirrored: a rotation or color-order setting in the display configuration — flip that option and re-upload.
Frequently Asked Questions
Which libraries do I need for the ESP32 2.8 inch touchscreen?
Most projects use TFT_eSPI for the ILI9341 display and XPT2046_Touchscreen for the resistive touch. For more advanced graphical interfaces, many makers add LVGL. The important part is configuring TFT_eSPI for this board's driver and pins.
Can the ESP32 touchscreen run without a computer?
Yes. Once you upload your sketch, it is stored in the ESP32's flash memory. The board then runs the program every time it gets power from any USB source, which is exactly what makes it a standalone device.
Does the display need Wi-Fi to work?
No. The screen and touch work completely offline. The ESP32's Wi-Fi and Bluetooth are optional — you add them only if your project needs to go online, for example to show live data on the screen.
Why is my ESP32 display blank?
The most common cause is a display configuration that does not match the board. Make sure the library is set for the ILI9341 driver and the correct pins, using the configuration provided for this board rather than a generic one.
Do I need to solder anything? No. The display and touch are already connected to the ESP32 on the board, so you only need a USB cable to start building.
Conclusion
A standalone ESP32 2.8 inch touchscreen project is one of the best ways to move from blinking an LED to building a real device with its own interface.
Set up the Arduino IDE, configure the display and touch libraries, and upload your sketch. You then have a self-contained screen that responds to touch the moment it gets power.
Ready to build yours? Get the ESP32 2.8-inch TFT touchscreen display and explore more robotics parts and accessories at RAM Electronics.