


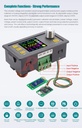

Technical parameters
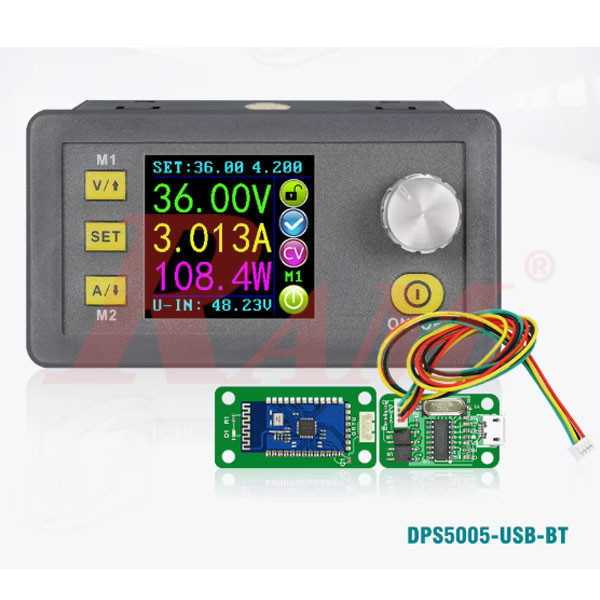
- Model: DPS5005
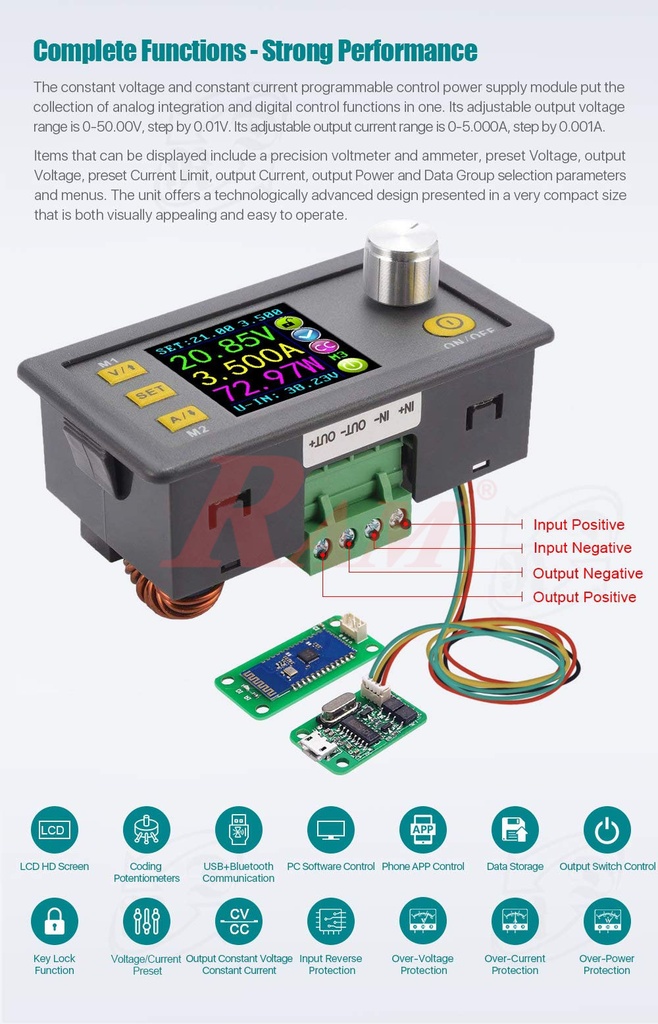
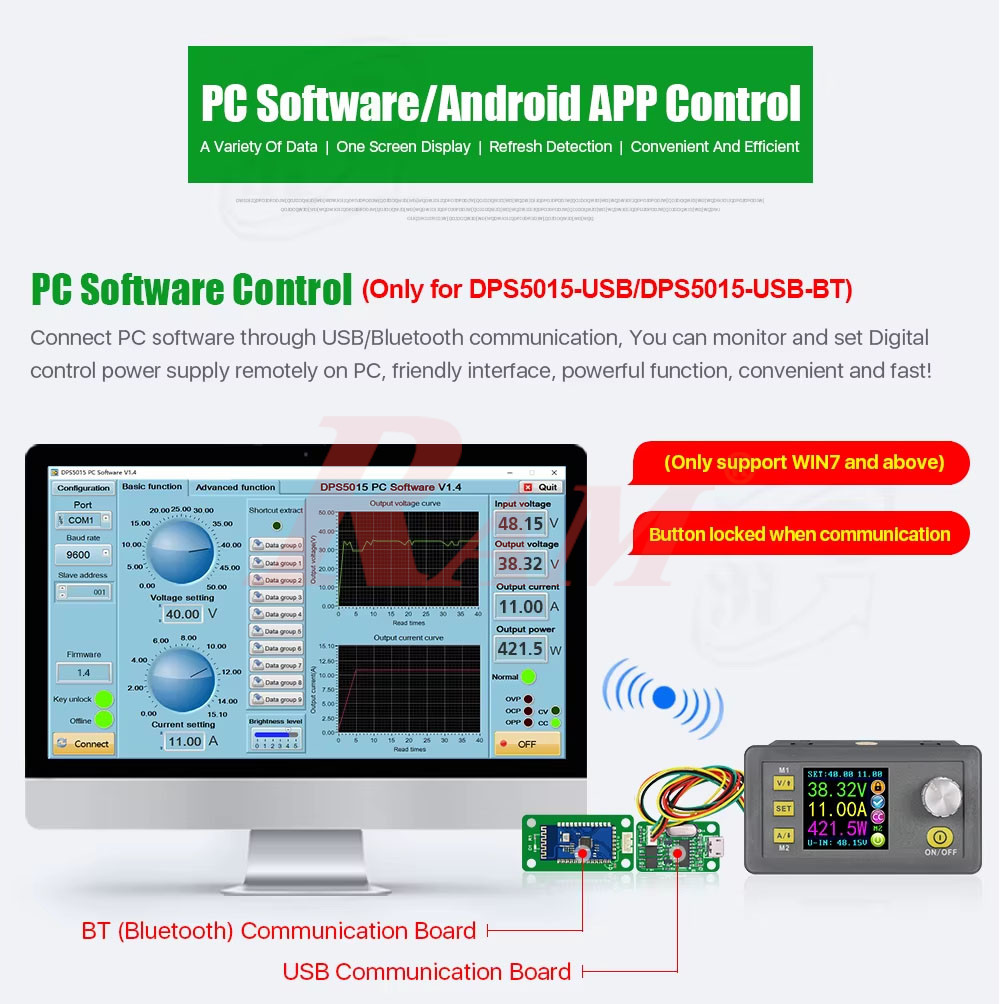
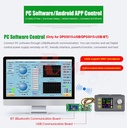
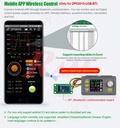
- PC connection via USB and Android connection via Bluetooth
- Input voltage range: 6.00- 55.00V
- Output voltage range: 0V-50.00V
- Output current: 0-5.000A
- Output voltage resolution: 0.01V
- Output current resolution: 0.001A
- Output power range: 00.00- 250.0W
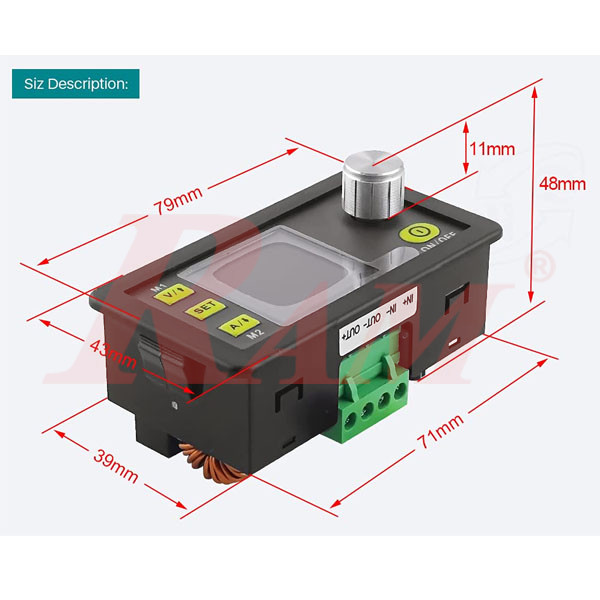
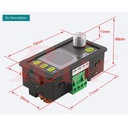
- Product Dimension: 79*43*48(mm) (L*W*H)
- Product Weight: about 113g
- Open size: 71mm*39mm
- Output Voltage accuracy: ± (0.5% + 3 digit)
- Output Current accuracy: ± (0.5% + 5 digits)
- Working mode: output voltage< input voltage/1.1
General Information
- IN+: Input positive
- IN-: Input negative
- OUT+: Output positive
- OUT-: Output negative
Note: The input voltage range is DC 6-55V, and 55V is the limit voltage; Don't exceed it. Or else it will be burnt. The input must be a DC power supply, not AC 220V, or else it will be burnt too. Though this module has reverse connection protection and output short circuit protection, you can must be in strict accordance with the connection description to connect. If you connect the supply power with the output, the module will be burnt.
How to Use:
1. Wiring the Module:
Input Power:
- Connect a DC power source (6V-55V) to the module’s input terminals (IN+ and IN-).
- Ensure the power source voltage is higher than the required output voltage.
Output Load:
- Connect the device or load to the output terminals (OUT+ and OUT-).
- Make sure the load’s voltage and current requirements are within the DPS5005's specifications (0-50V, 0-5A).
2. Powering On:
- Switch on the DC power source.
- The DPS5005’s LCD screen will display the input voltage, output voltage, current, and power.
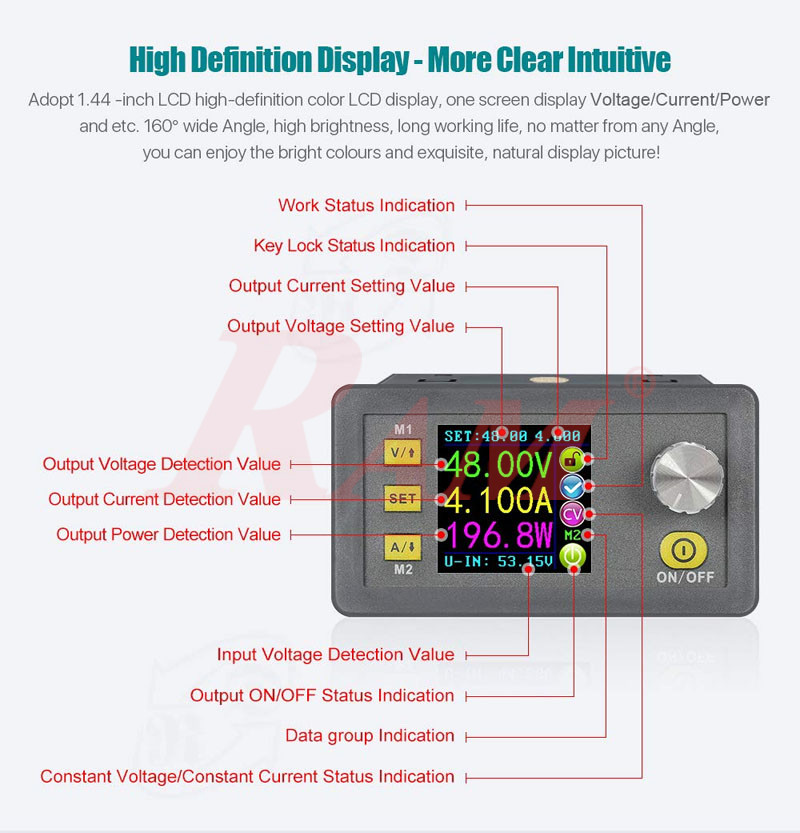
3. Data Setting Interface
Set the output Voltage and output Current Limit via the Main Interface:
Press V/↑ key to enter the Voltage setting mode. The Voltage setting numeric value will be highlighted by the cursor. Press the rotary control to place the cursor at the required character of the numerical value you wish to change. Further presses of the rotary control will cycle through the characters available. Turning the rotary control clockwise increases the value and anticlockwise decreases the value. Press V/↑ key again to exit. Alternatively, after 30 seconds of inactivity the setting mode will exit automatically. Press A/↓ key to set the output Current Limit using the same procedure.
Set the output Voltage and output Current Limit via the Data Setting Interface:
On the main interface press the SET key to enter the Data Setting Interface. In the Data Setting Interface press V/↑ or A/↓ key to step up or down through the menu options to select U-SET (Voltage) or I-SET (Current Limit), and then set the output Voltage and output Current Limit in the same way as used in the main interface. Press the SET key to return to the menu options and press the SET key again to exit.
Tips:
- Safety First: Double-check connections to avoid short circuits.
- Accuracy: Use the fine adjustment option (press the knob once to toggle) for precise settings.
- Monitor: Continuously observe the LCD to ensure parameters stay within limits.