Building a DIY Bluetooth speaker starts with the right amplifier board, and the XH-A158 is one of the most common choices for small, low-power builds. It pairs a PAM8403 audio amplifier chip with Bluetooth 5.0 input, giving you wireless stereo sound in a board small enough to fit inside almost any enclosure. This guide covers what's actually inside the board, how to wire it, and what else you'll need to finish your project.
Ready to see full details? View the XH-A158 PAM8403 Amplifier product page
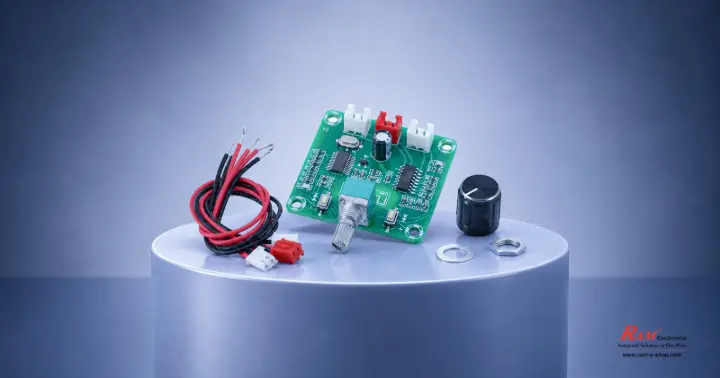
What Is the XH-A158 PAM8403 Bluetooth Amplifier Board?
The XH-A158 is a compact, energy-efficient stereo amplifier module built around the PAM8403 Class-D amplifier chip, with Bluetooth 5.0 audio input built in.
It's designed specifically for DIY portable speaker projects — pair it with a power source and a set of speakers, and you have a working wireless speaker with minimal extra wiring.
Inside the PAM8403 — Why This Chip Is a DIY Audio Favorite
The PAM8403 is a Class-D amplifier IC, which means it switches power on and off rapidly rather than amplifying continuously — the practical benefit is much higher efficiency (typically over 90% on this board) and far less heat than older amplifier designs.
That efficiency is why PAM8403-based boards are so common in small battery-powered or low-voltage DIY audio projects: less wasted energy as heat means a smaller board, less power draw, and no need for a heatsink in most builds.
Power Output and Speaker Compatibility
This board delivers 2×5W of dual-channel stereo output into a 4Ω load, with support for speakers rated between 4Ω and 8Ω. That's enough power for small bookshelf-style DIY speakers or portable builds, though it's worth setting expectations: at 5W per channel, this is a board for personal or near-field listening, not a large-room or party speaker.
How to Wire the Amplifier for Your DIY Bluetooth Speaker
- Connect a stable 5V DC power supply rated at least 1A to the board's power input — an unstable or underpowered supply is the most common cause of distorted sound on these boards.
- Wire your left and right speakers (4Ω or 8Ω) to the corresponding output terminals.
- Power on the board — Bluetooth pairing happens automatically, so it will be discoverable from your phone or other Bluetooth source without any button press or app.
- Ensure the board has adequate ventilation, especially if you'll be running it at higher volumes for extended periods.
- Once paired, stream audio directly from your phone — no additional module is needed if your audio source is Bluetooth-based.
See full specs and order this board: XH-A158 PAM8403 Amplifier product page
Need More Power? Comparing Amplifier Options
If your project needs more volume or you're driving larger speakers, it's worth knowing this isn't the only option RAM carries.
The TPA3110 Bluetooth amplifier board delivers 2×15W — three times the output of the PAM8403 board — but requires a 10-25V DC power supply instead of a simple 5V source, which is a meaningfully different (and often bulkier) power setup.
For small, low-voltage, battery-friendly builds, the PAM8403 board is the simpler choice; for room-filling volume, the TPA3110 is worth the extra power supply complexity.
What You'll Need to Complete Your DIY Speaker Project
Beyond the amplifier itself, a full DIY Bluetooth speaker build typically needs: a pair of compatible speakers (4-8Ω), a stable 5V/1A+ power supply, and an enclosure to house everything.
If you'd rather play stored audio files instead of streaming from a phone, the DFPlayer Pro MP3 module can serve as your audio source — its own documentation notes it can be used as a sound card, meaning it outputs audio that an amplifier like this one can then drive to your speakers.
Frequently Asked Questions
What speaker impedance works with this amplifier board?
It's rated for 4Ω to 8Ω speakers, with maximum output (5W per channel) specified at 4Ω.
Do I need to pair the Bluetooth manually every time?
No — the board pairs automatically with a nearby Bluetooth source once powered on, without needing a pairing button or app.
Can I power this board from a USB power bank?
Yes, as long as the power bank can supply a stable 5V at 1A or more. An underpowered or unstable supply is the most common cause of distorted or weak sound on PAM8403 boards.
Why does the board run so cool compared to older amplifier types?
It uses a Class-D amplifier design, which is significantly more power-efficient (typically over 90%) than older analog amplifier classes, so far less energy is wasted as heat.
What's the difference between this and the TPA3110 amplifier board?
The TPA3110 delivers roughly three times the power output (2×15W vs. 2×5W) but requires a 10-25V DC power supply instead of a simple 5V source, making it better suited to louder, room-filling builds rather than small portable speakers.
Ready to start your build? Shop the XH-A158 PAM8403 Amplifier now or browse the full Audio, Sound & Camera Modules collection for more amplifiers, modules, and audio accessories.